Offline merge
The Offline merge feature is applicable for BT and OBS.
- Bible Translation (BT)
- Open Bible Stories (OBS)
The Offline Merge feature enables multiple translators to work independently on the same Bible translation project and later merge their changes into a unified version.
Key Features
- Allows translators to work offline and synchronize changes later.
- Supports collaboration among multiple translators on the same project.
- Helps manage and resolve conflicts during the merge process.
Steps to Perform an Offline Merge
- Click the Import button on the Projects page.
- Select the desired folder and click Select/Open Folder.
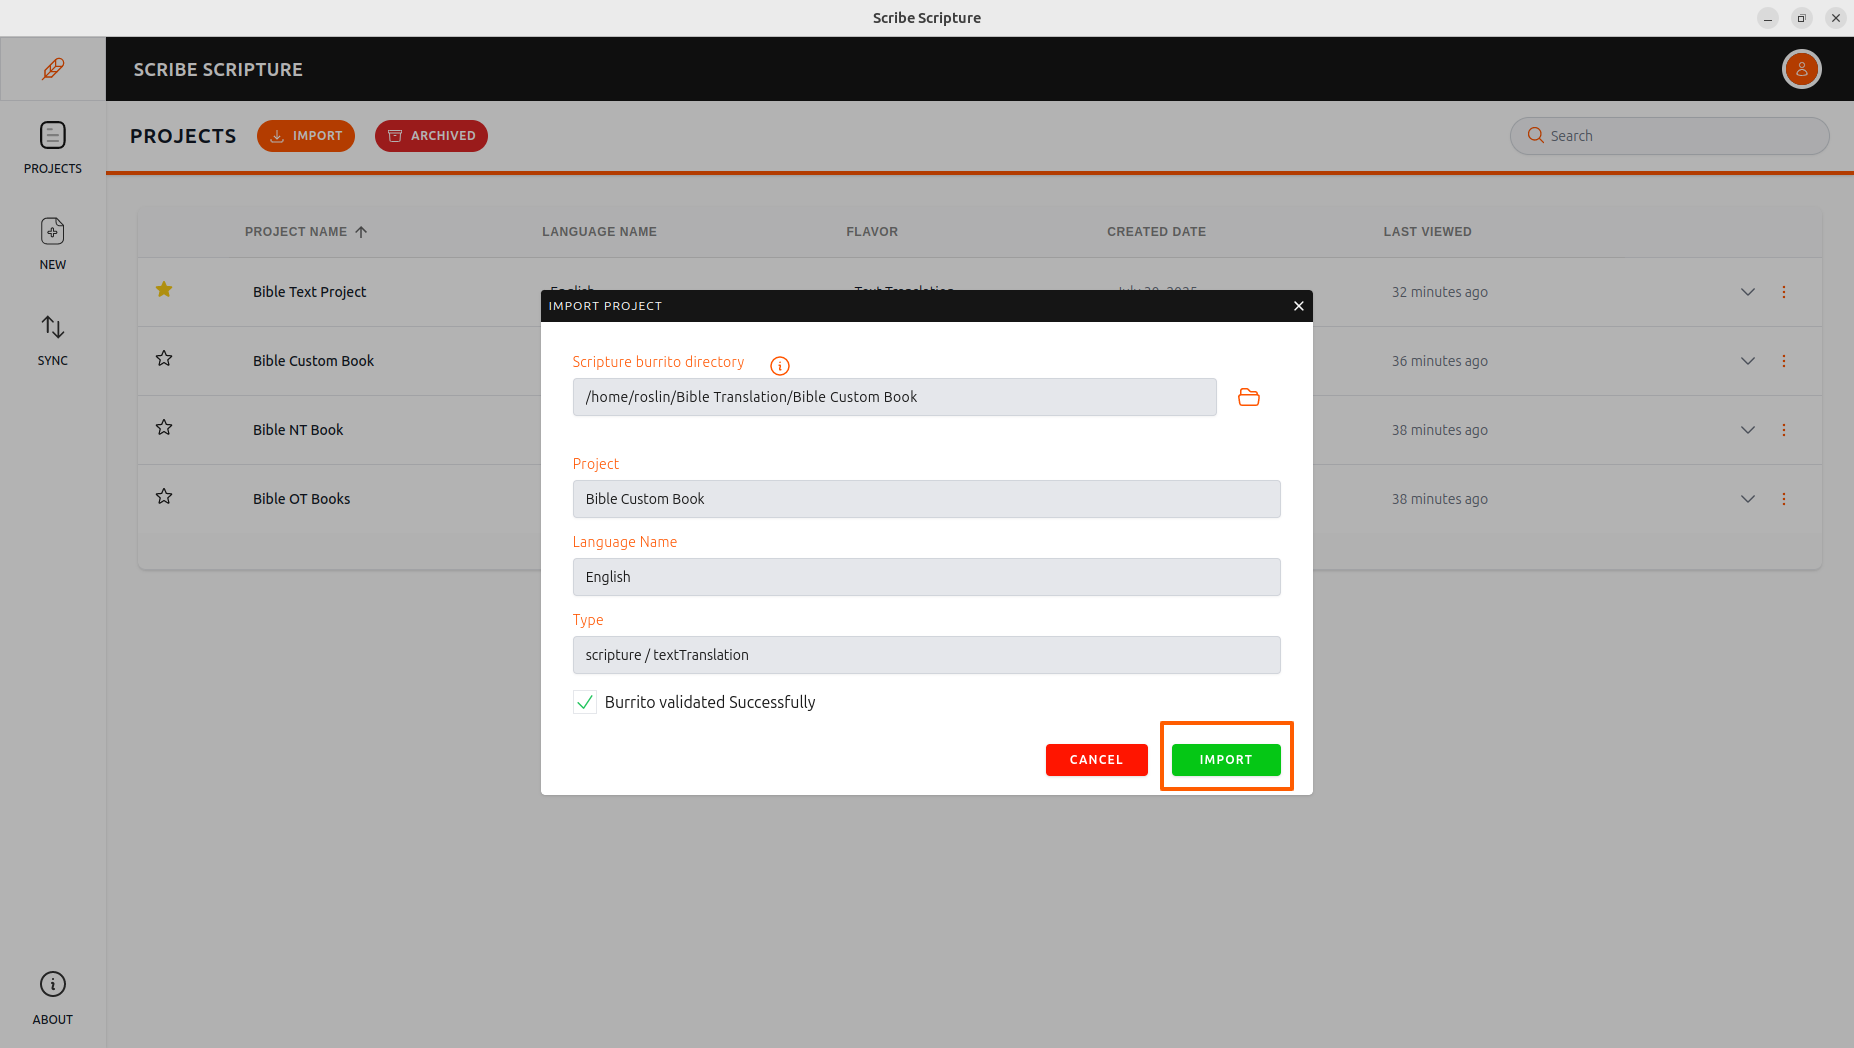
- The import project dialog box will appear and display project details such as:
- Scripture Burrito directory
- Project name
- Language
- Project type
- To confirm, click the import button.
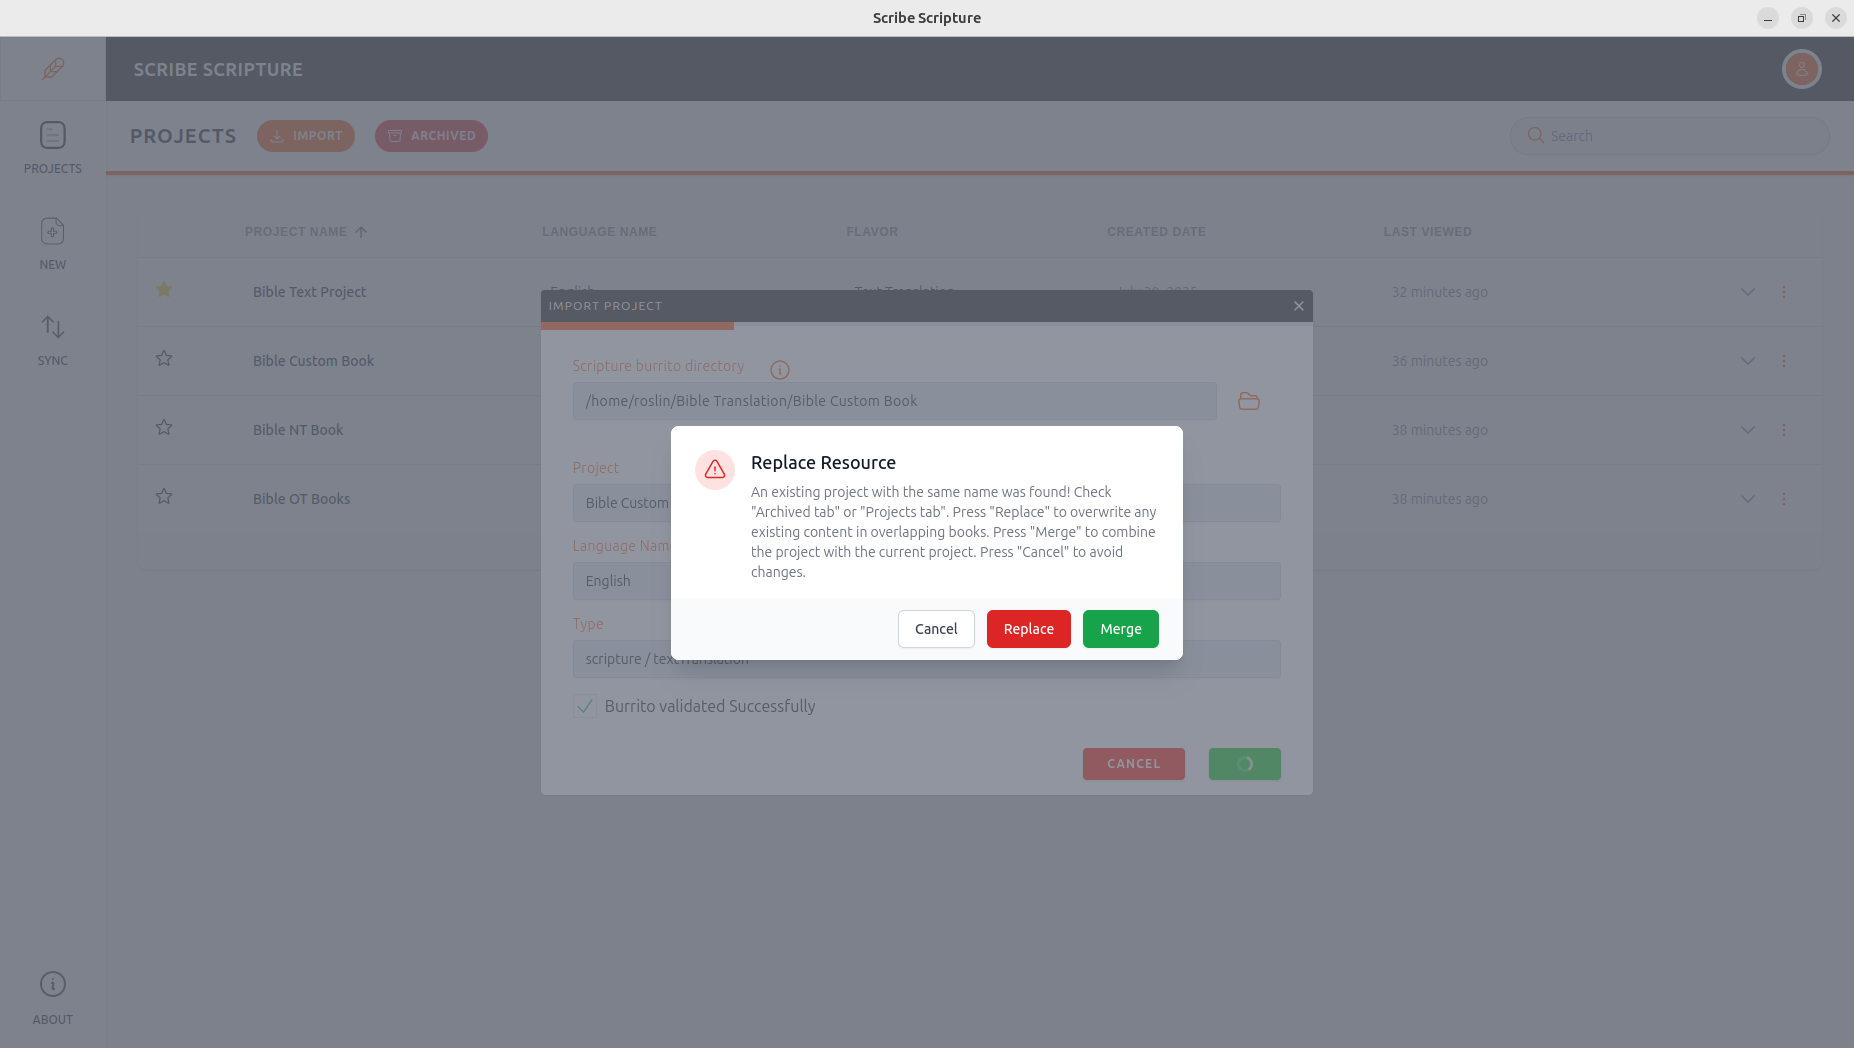
Replace Resource Dialog Options
- After importing a project, a dialog box appears with three options:
- Replace - Completely replaces the existing project with the new one.
- Merge – Combines the new project with the existing one.
- If there are no conflicts, the updated project appears in the project list.
- If there are conflicts, you'll be taken to the conflict resolution screen.
- Cancel – Closes the dialog without making any changes.
Aborting Conflict Resolution
If the user does not wish to continue, they have the option to abort the conflict.
Steps:
- Click the Close (×) button in the top-right corner.
- An Abort Conflict Resolution confirmation popup will appear.
- Confirm to exit without saving any current changes.
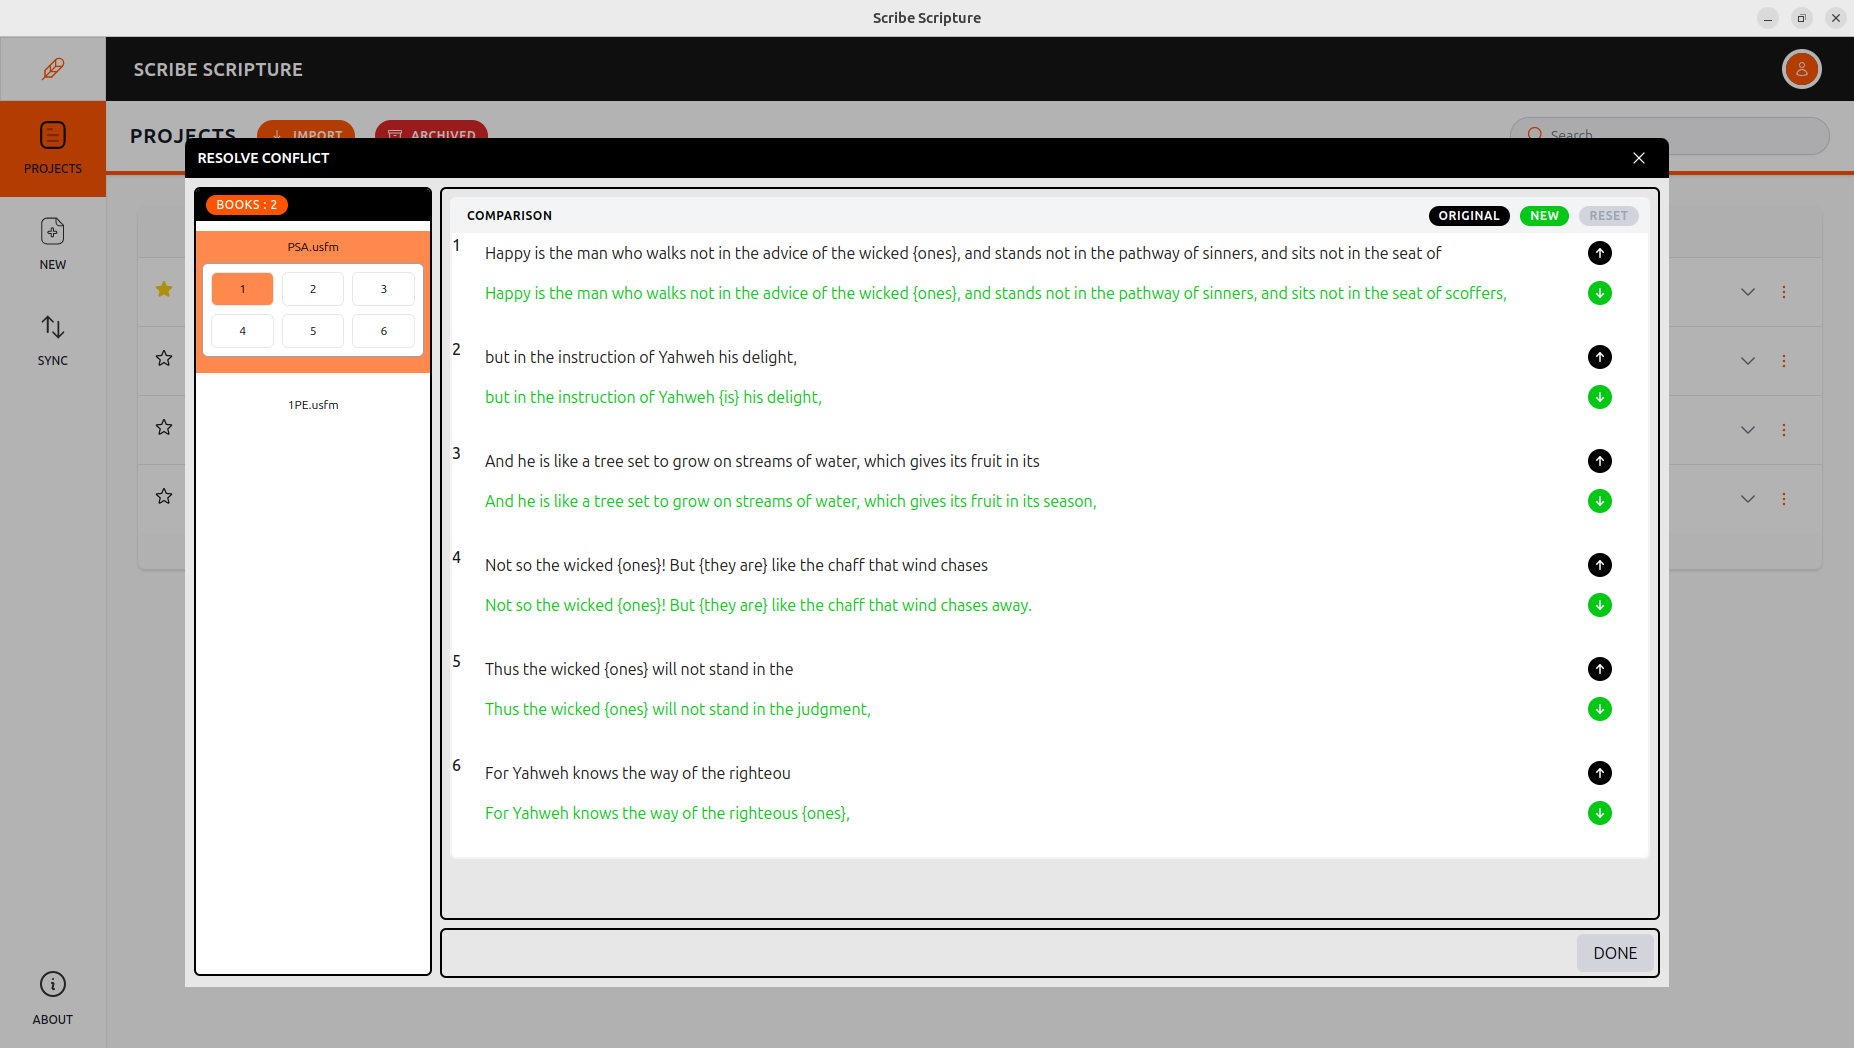
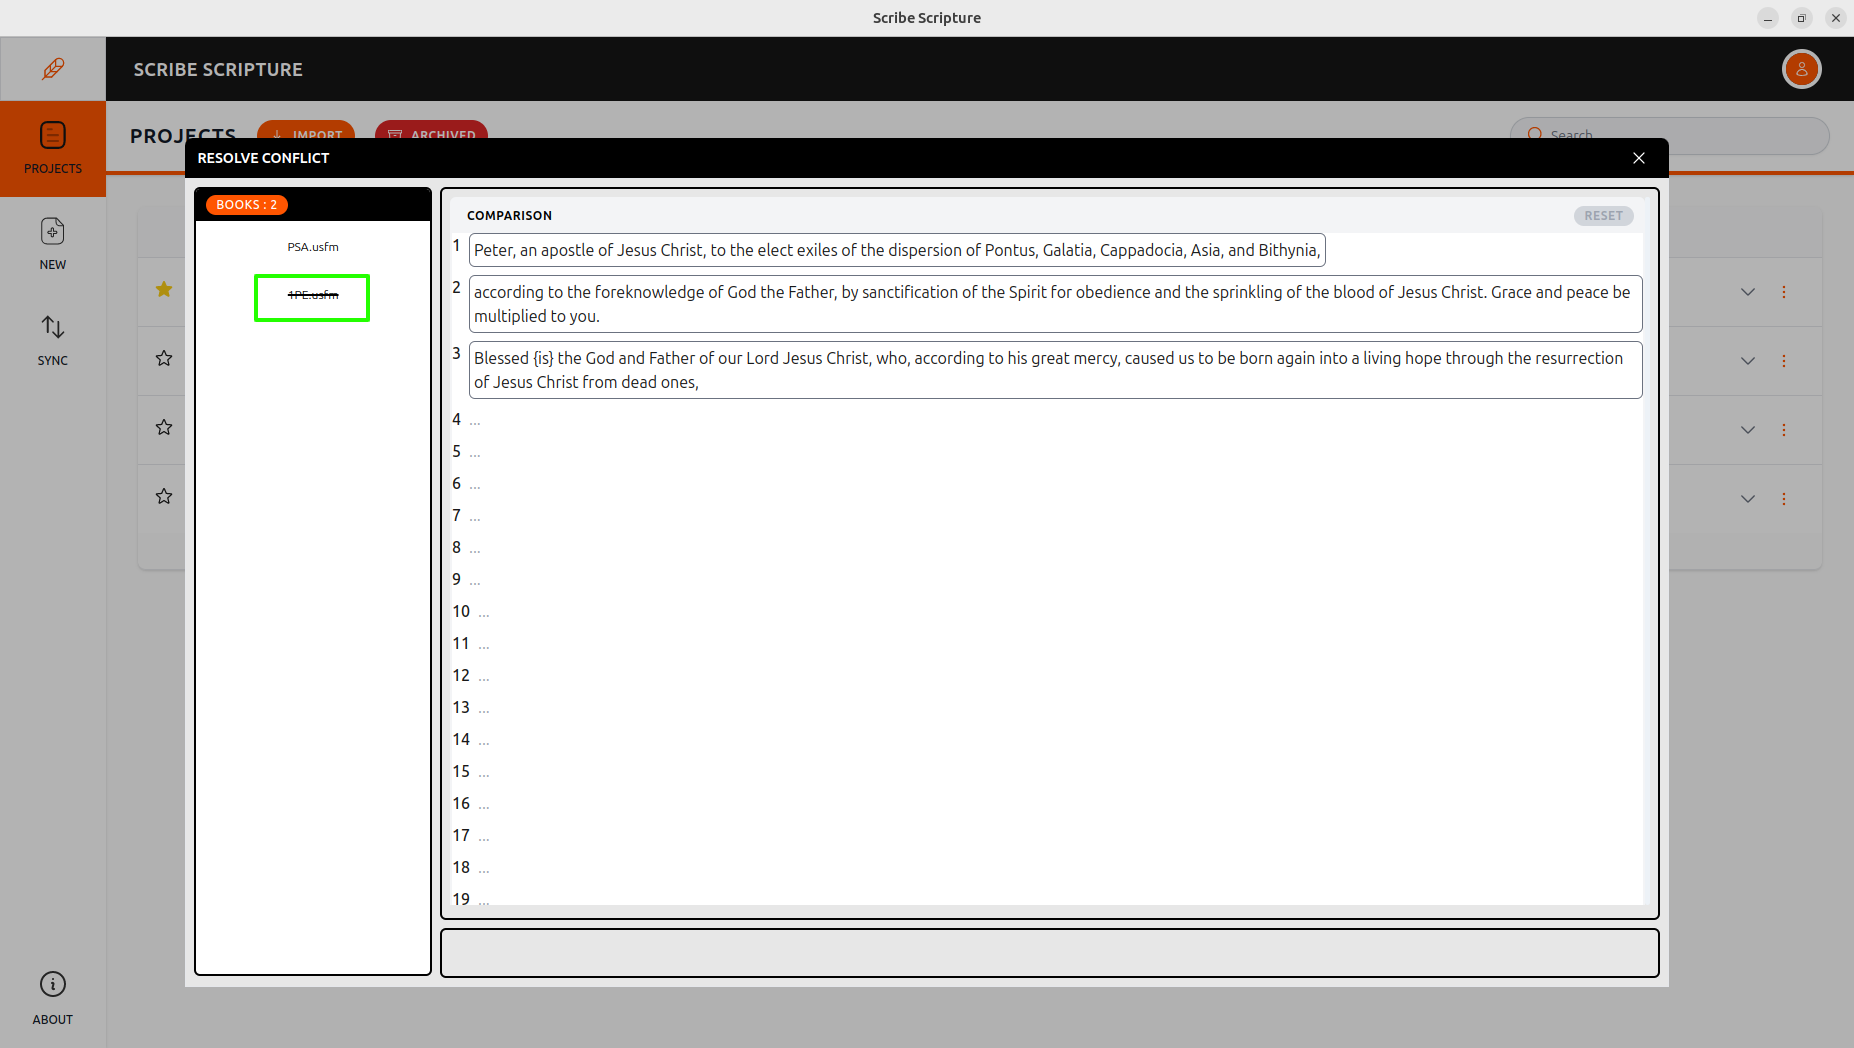
Resolving Individual Conflicts
- Each conflicting section is displayed in the editor pane.
- Original content (from the current project) appears in black.
- New content (from the imported project) appears in green.
Steps:
- Above each section, choose one of the following options:
- Original – Keeps the existing content.
- New – Replaces with content from the imported project.
- To undo a selection, click the Reset button above the section.
Handling Chapter-Level Conflicts
1. Resolve Conflicts in Sections
Look at each conflict and choose either Original or New.
2. Reset if Needed
After resolving all sections, the Reset button becomes active. Click it to undo changes in the current file if needed.
3. Complete Chapter Resolution
When all conflicts in a chapter are resolved, the Resolve Book button will appear.
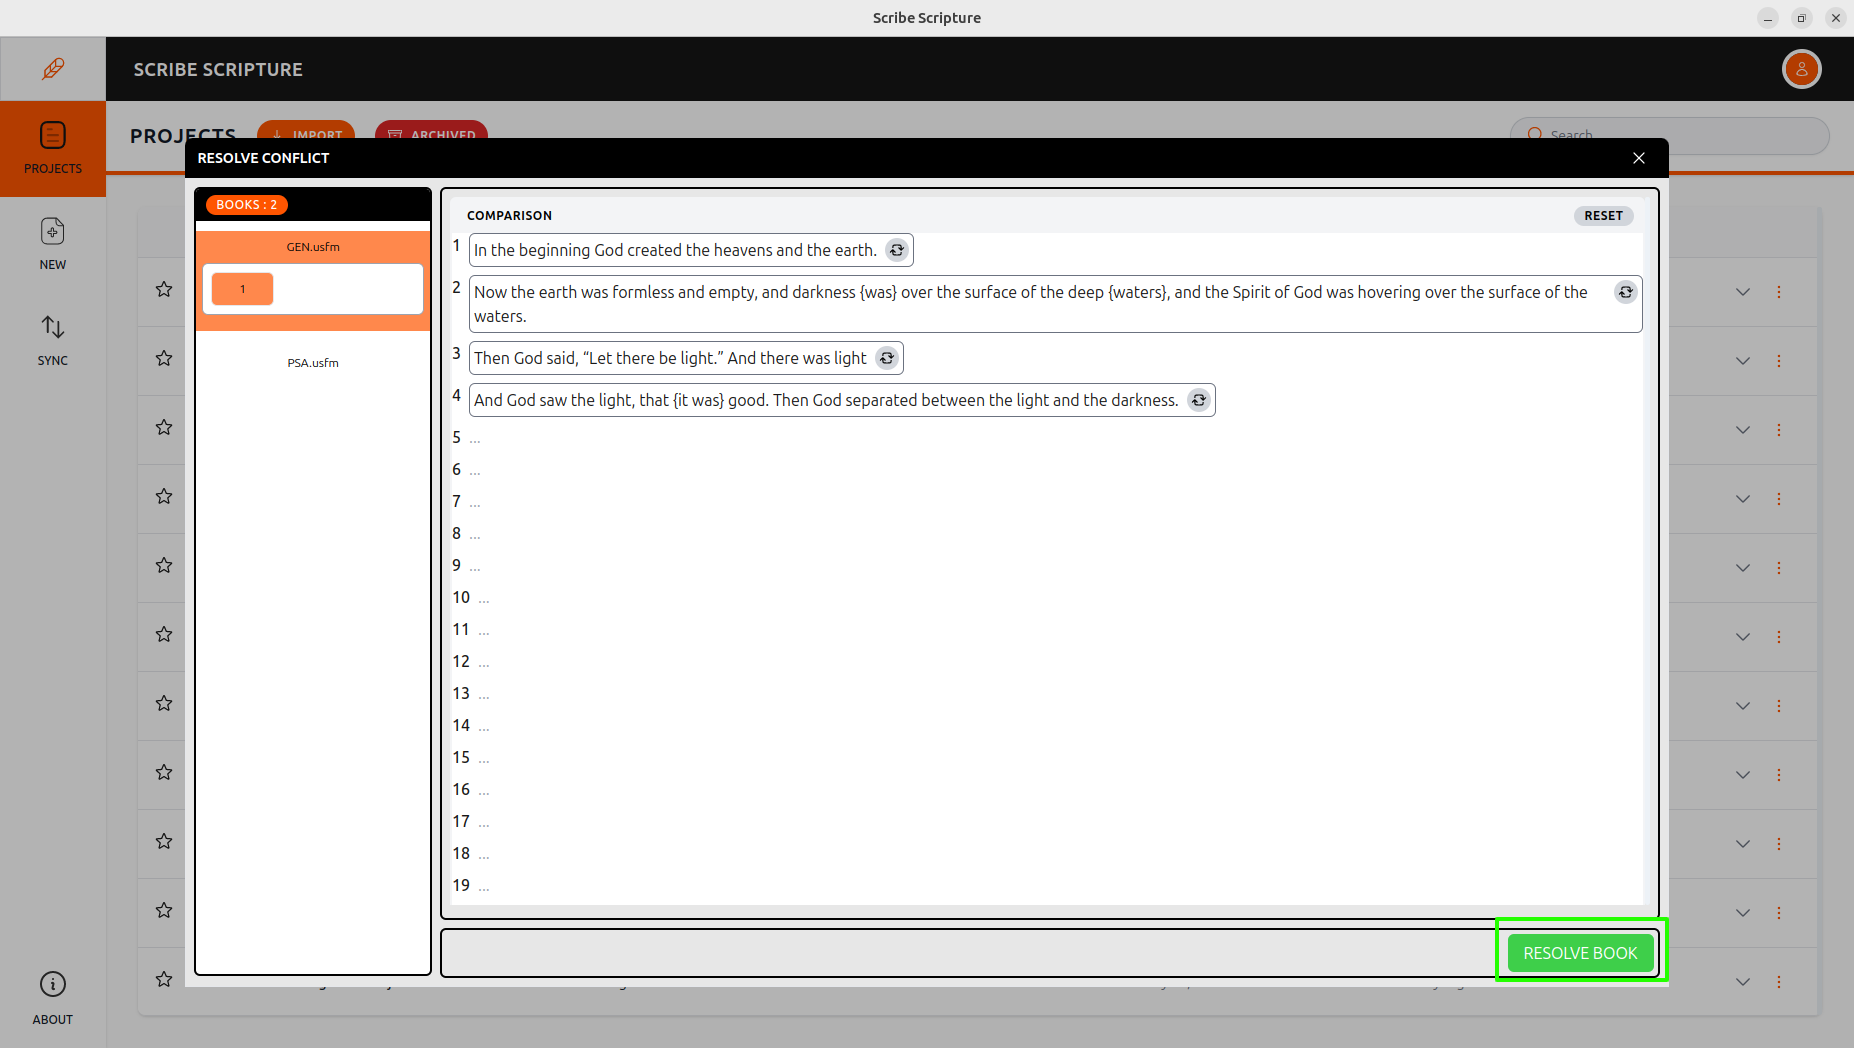
4. Chapter Marked as Complete
Once you click Resolve Book, the chapter number on the left will appear with a strikethrough, indicating that all conflicts in that chapter have been resolved and it is now marked as complete.
Finalize the Merge
- After resolving conflicts in all chapters of a book, the user can click Done.
- Once all books are conflict-free, the user can complete the merge process by clicking the Finish button.
Visit Import Project page for more information on how to import a project. Offline merge refers to the process of merging changes from one translator to another working on the same project. It allows translators to make changes and carry out merge operations on their local systems. This feature can be used with multiple translators. When multiple users are working on the same project conflicts may occur while merging. This page allows users to review conflicting changes, decide how to resolve them, and then merge them as needed.
Steps to offline merge
- Click Import button
 on the projects page
 - Choose the desired folder for import and click on Select/Open Folder
- The IMPORT PROJECT dialogue box will appear and display project details, such as Scripture Burrito directory, Project and language name, and project type
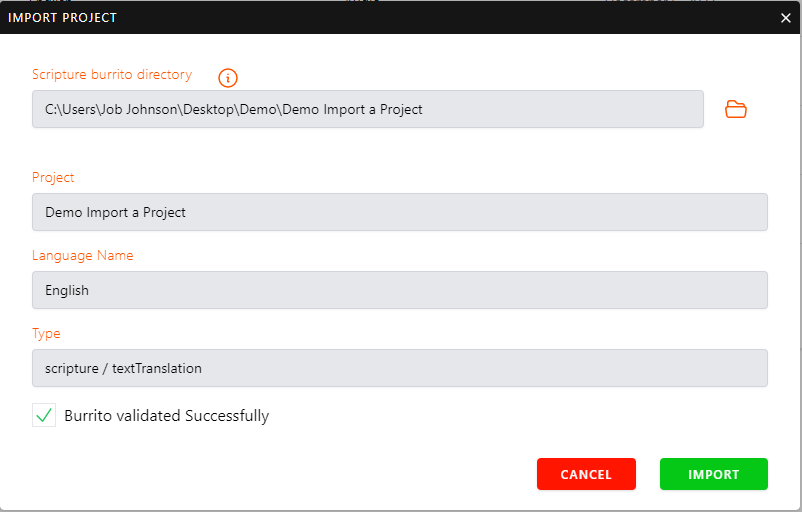
- To confirm the import, click the IMPORT button

- A Replace Resource dialogue box will open with the options to Replace and Merge (only for OBS)
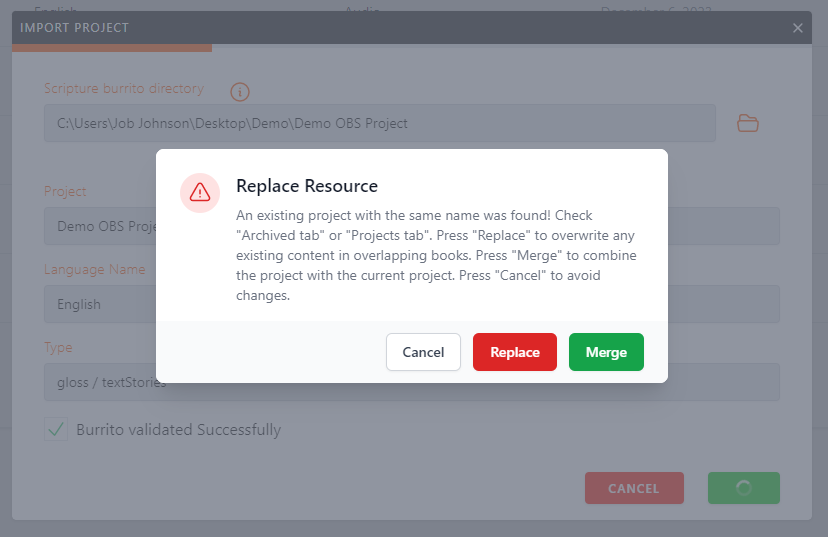
- If Replace is chosen, the entire project is replaced by the incoming content
- If the user selects the Merge option
- It will process the project Merge operation
- If no conflict is found, it will take the user to the project listing page with the updated project
- If there is a conflict in the project
- The user will be taken to the Resolve Conflict pane

- Suppose the user decides to Abort the Resolve Conflict action. Click the close (x) symbol in the top right corner. It will bring an Abort Conflict Resolution to pop up
Steps to Resolve Conflicts
The Resolve Conflict page appears when a user selects the Merge option
- A list of files with conflicts appears in the left section of the pane
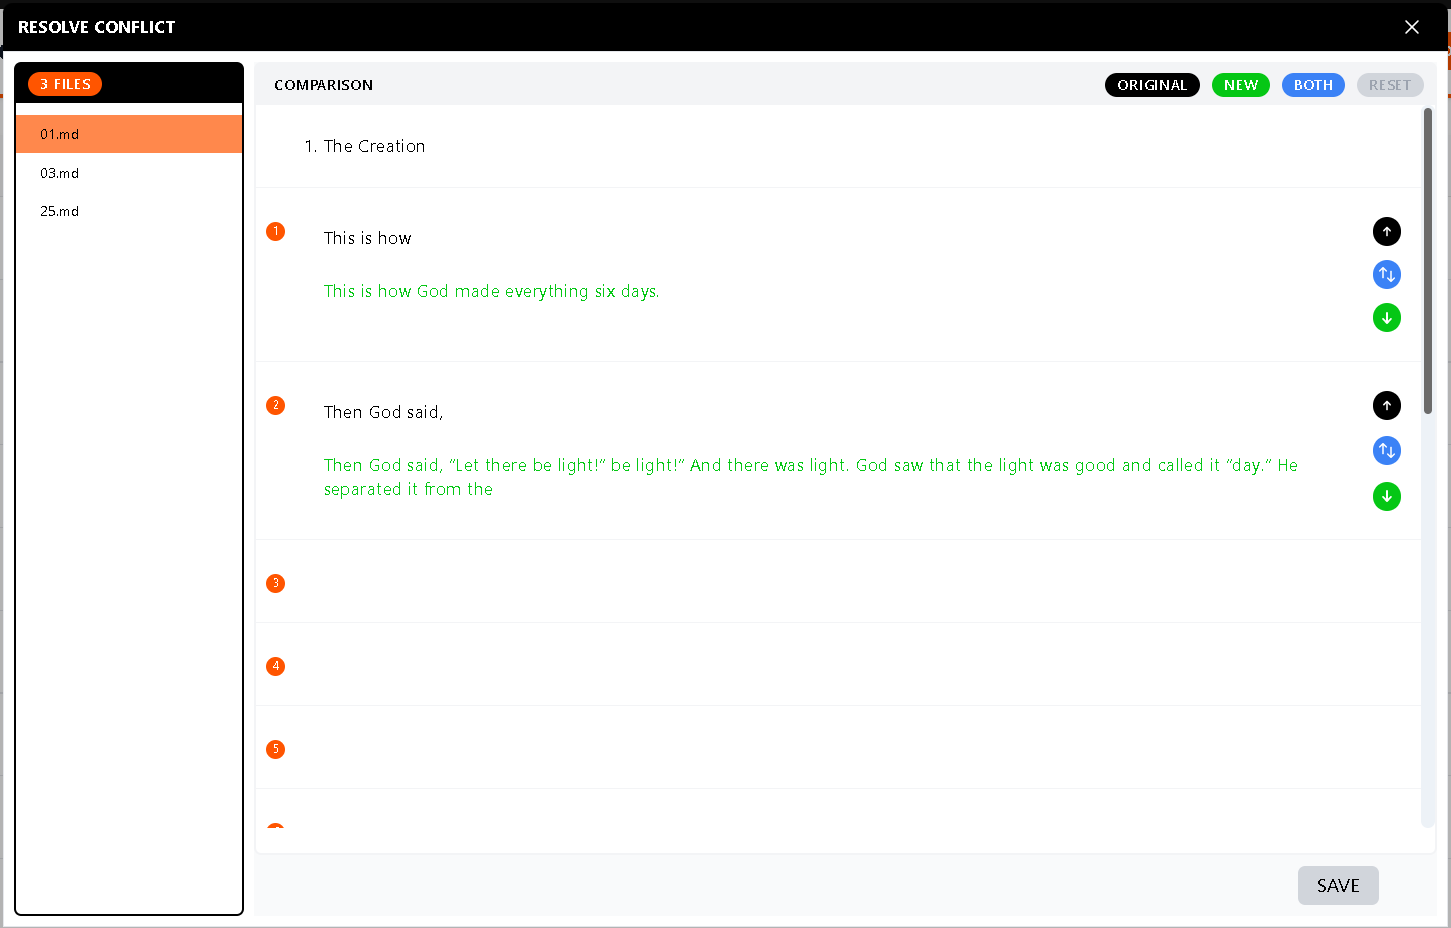
- Individual section/para can be seen in the editor pane. Conflicting ones will show with the Original in black and New in green
- Select one of the options provided above the section to confirm (
 )
)- Original (already the user has in the project)
- New (what we get from the imported project)
- Both (combines Original and New)
- If the user decides to undo the action, click Reset above the individual section
On the upper right side, there are choices for resolving the overall conflicts for the active file (ex: 1.md, for the competing file)
- Original (all the conflicts will be resolved with original change)
- New (all the conflicts will be resolved with new change)
- Both (combines Original and New)
- After fixing all the conflicts in the current file the Reset button will be enabled to reset the current changes to the initial state
- After all conflicts have been resolved on each page, click the Save button

- In the left section of the pane, the resolved file is marked as strikethrough, indicating that it has been resolved
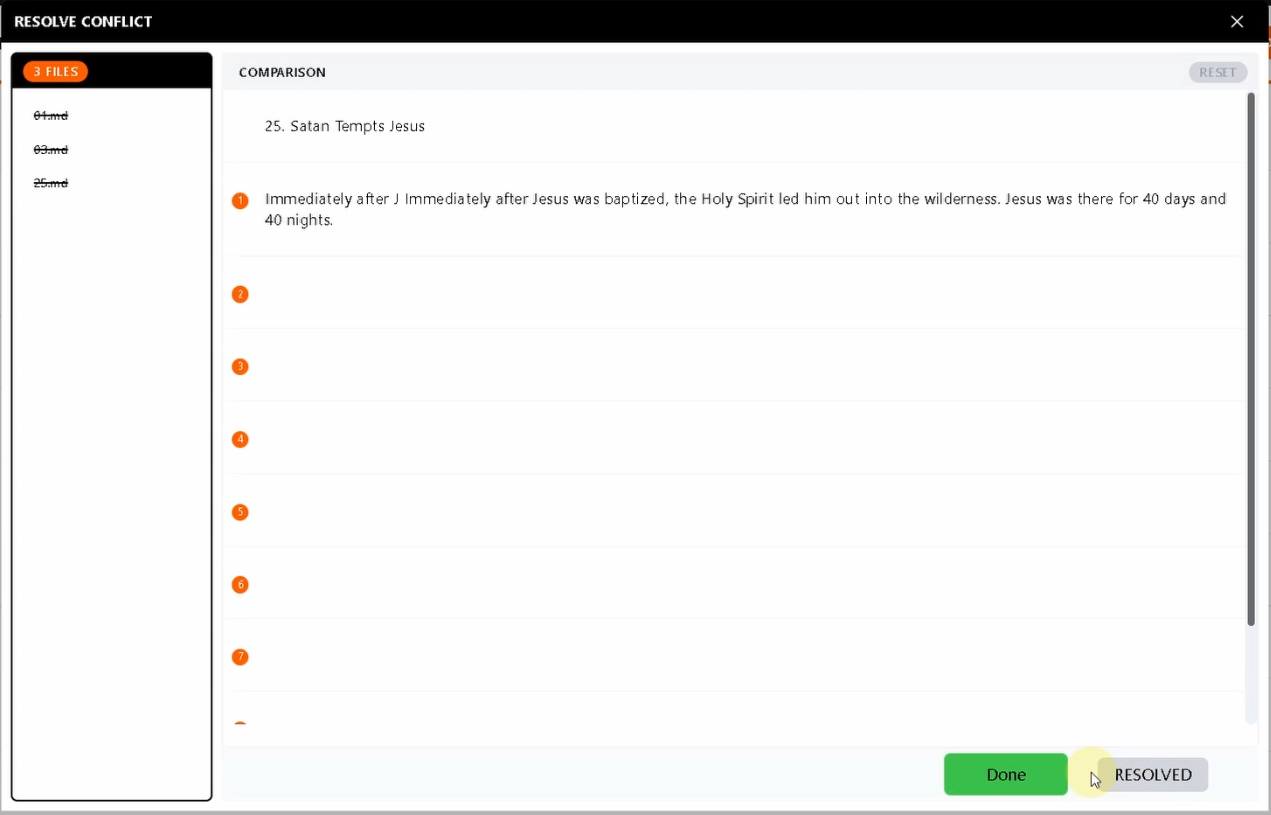
- Once all the conflicts have been resolved a button will appear, stating Resolved
- Click Done to finish the process